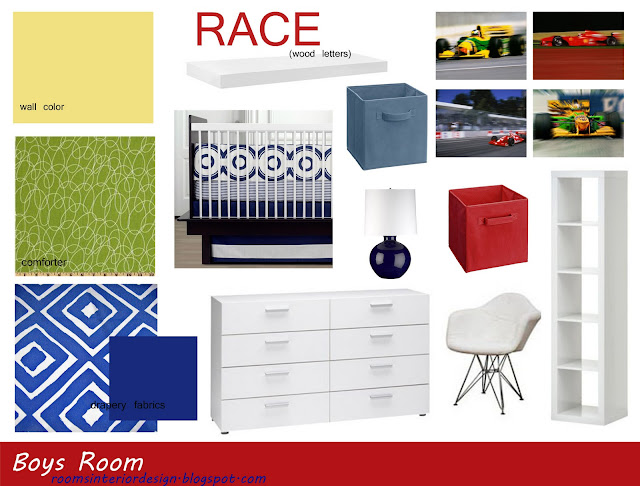
Project Peek - Boy's Room

Remember this room design I showed you awhile back?


As I mentioned, I had to make a few changes to the design.  I found out there was a blue and red race car toddler bed that would be used when 'baby boy' got to that stage.  So instead of using orange, I switched to red.  This way the red/blue toddler bed would match the room when the time came to use it.  Also, I received further clarification on the doing a race car theme - It needed to be Formula 1 race cars. 

 This is what I came up with...


The family that I am doing this design for lives in Utah where I used to live, because of modern technology (thank you)  I am still able to help them.  

Here is a sampling of the drawings I emailed to them to illustrate the design:


If you are interested in my design service, email me :)

Comments

  1. Aah, and you're talented and flexible. Well done!

    ReplyDelete
  2. What a fun design board Melissa! If you don't mind me asking, what program did you use to create the drawings/layout of the room? I would love to learn more. Thanks!

    ReplyDelete
  3. He is going to be one happy young man. Really great design!

    ReplyDelete

Post a Comment

Thank you for taking the time to leave a comment! I love reading them!

Popular posts from this blog

How to Accessorize an End Table or Nightstand

Stuck on how to accessorize an end table or nightstand?  There are so many ways to style/accessorize a table, and really there are no rules. However, if you aren't sure where to begin below is a list of basic items to use that you can't go wrong with: *A lamp * Artwork/mirror *Books * Floral/branches In addition, here are a few more accessorizing tips to get you on your way: Use items of varied heights to keep the eye moving.  Have something short, something medium, and something tall.  Use stacked books to add height if needed. Meredith Heron Layer your accessories.  Don't be afraid to let your lamp cover a portion of the artwork. via                                                                   Group differently shaped items together.  If ev...

My Favorite Way to Hide Toys in My Family Room

We were is desperate need of something to hide toys in our family room.  In addition, I really needed something to go along the back our loveseat.  Below, is basically the view you get when you walk into our home.  I didn't want people to walk in & the first thing they see is the bare back of our loveseat. One day, I was meandering around TJ Maxx & spotted this cute storage ottoman.  Right away, I knew it needed to come home with me! It has proved to be a fantastic purchase for us!  My kids can easily get toys in & out of it.  It is also a very convenient place to sit & put your shoes on before heading out the door.  In addition, it can easily be moved around to the main sitting area if extra seating is ever needed. You KNOW you have made a good purchase when your husband has said TWICE, "Melissa, buying that ottoman was a really good idea."  Need some other ideas on how to hide toys?   Cute baskets/bo...

Project Reveal: Church Foyer Makeover

I apologize for being a little MIA on this blog lately!  Life has been busy lately working with local clients, my family visiting, & working on our newly purchased home. Recently, I completed a project that I would like to share.  A local church hired me to help them redecorate their foyer area.  They wanted something new, fresh & modern that would go along with the existing paint, flooring, and lighting. Here are the BEFORE photos: This is what it looks like now! Custom Welcome/Reception Desk A special thanks to Palmetto Street Church of God for allowing me the privilege to help make their foyer shine! Photography by the wonderful  Liz Odom .  If you would like  help designing your home or business visit my website !